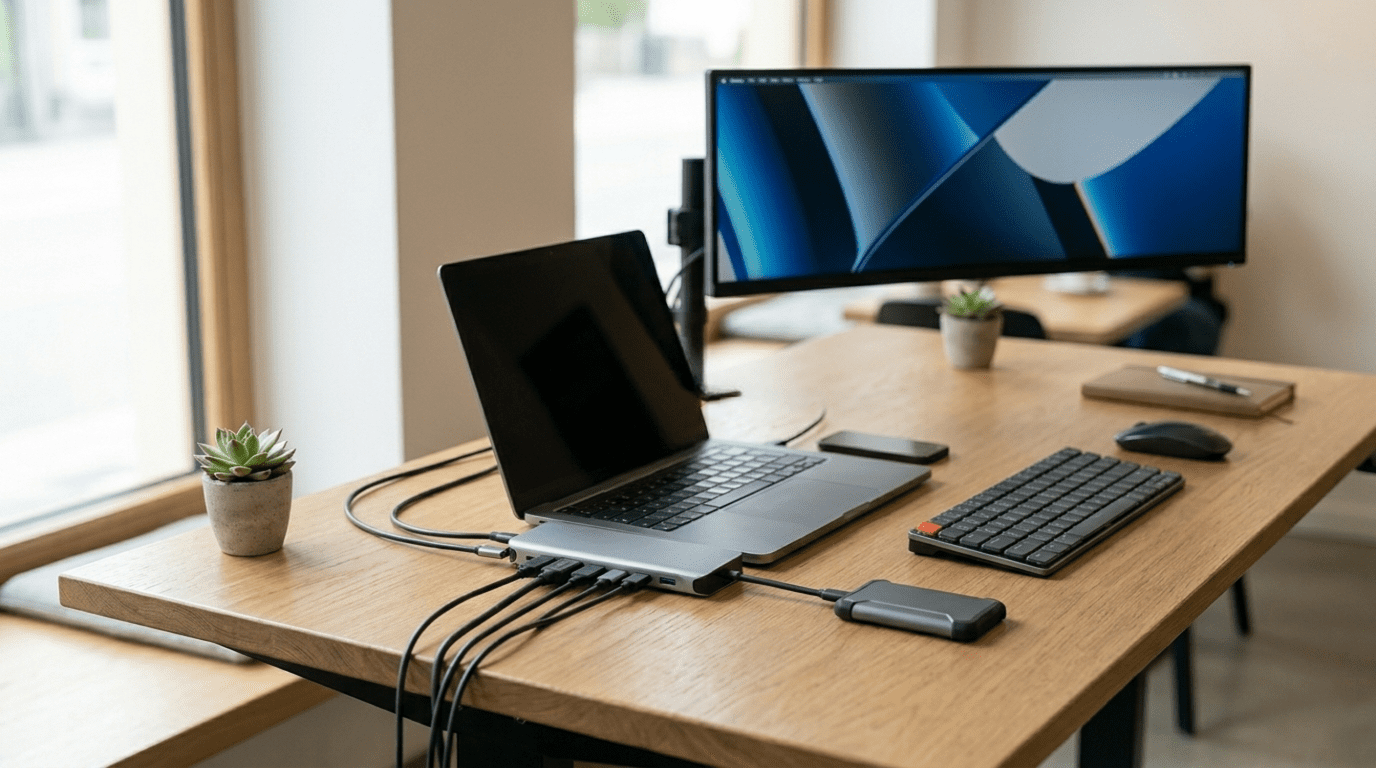
You open your MacBook, ready to connect an external monitor, plug in a hard drive, and charge your phone at the same time. Then reality hits. Two USB-C ports. That is it.
Apple’s obsession with slim designs has been both a blessing and a frustration for MacBook users for years. In 2026, the problem has not gone away. If anything, it has become more noticeable as people build more complex home offices and creative setups.
That is exactly why the best USB-C hub for MacBook 2026 is no longer a luxury. It is a practical necessity. Whether you are a designer juggling multiple screens or a student who just needs an HDMI port and an SD card reader, the right hub or dock changes how you work every single day.
What to Look for in a USB-C Hub or Dock
Before spending money, it pays to understand what actually matters. Not all hubs are created equal, and a cheap $15 option from an unknown brand will almost always disappoint.
Power Delivery (PD) This is the first thing to check. A hub with 100W power pass-through lets your MacBook charge at full speed while everything else stays connected. Anything below 60W and you might notice your battery slowly draining during heavy use.
Display Support This is where many buyers get caught off guard. MacBooks powered by Apple M1 and M2 chips officially support only one external display. M3 MacBook Pros and above can support two, but only with hubs or docks that use specific chipsets. Always check whether the hub supports DisplayLink or uses the native Alt Mode before assuming it will work for dual monitors.
Data Transfer Speeds If you work with large video files or connect fast SSDs, look for USB 3.2 Gen 2 or Thunderbolt 4 ports. Standard USB 3.0 ports cap out at 5Gbps, which feels slow once you have worked with faster options.
Apple Silicon Compatibility Some older docks were designed around Intel Macs. They may work in limited ways with M-series chips but skip certain features. Always verify compatibility with your specific MacBook model before buying.
Top USB-C Hubs and Docking Stations for MacBook in 2026
1. CalDigit TS4 Thunderbolt 4 Dock
This is the gold standard for MacBook docking stations in 2026. With 18 ports including three Thunderbolt 4 connections, 98W host charging, and support for dual 6K displays on M-series MacBook Pros, it handles demanding professional setups without breaking a sweat.
Best for: Professionals running multi-monitor workstations at home or in the office.
2. Anker 777 Thunderbolt Docking Station
The Anker 777 hits a sweet spot between performance and price. It delivers 85W charging to your MacBook, includes a 2.5G Ethernet port, two HDMI outputs, and multiple USB-A ports. The compact aluminum build holds up well on a desk for years.
Best for: Office workers who need a reliable daily driver without paying premium prices.
3. Satechi Slim 5-in-1 USB-C Hub
If portability matters, this slim hub travels well and handles light workloads efficiently. It includes HDMI 4K at 60Hz, SD and microSD card slots, and two USB-A ports. It is thin enough to slip into a laptop sleeve alongside your MacBook.
Best for: Photographers and content creators who travel frequently and need quick card access.
4. OWC Thunderbolt Hub
OWC built this hub specifically for Mac users. Four Thunderbolt 4 ports and 60W charging make it ideal for Mac studios and power users who daisy-chain devices. It is compact but powerful and handles everything from NVMe drives to Pro Display XDRs.
Best for: Video editors and audio producers working with external storage and high-resolution monitors.
5. Belkin Connect Pro Thunderbolt 4 Dock
Belkin’s 12-port dock is one of the most reliable options for MacBook Pro users who want a clean desk setup. It supports dual 4K displays, charges your MacBook at 90W, and includes front-facing USB ports for quick access. The build quality is consistent and long-lasting.
Best for: Multi-taskers managing both a home office and an external display setup.
6. HyperDrive GEN2 12-Port USB-C Hub
For MacBook Air users who do not need Thunderbolt speeds but want more ports than any single hub usually offers, HyperDrive’s 12-port option covers almost every scenario. HDMI, three USB-A, USB-C, Ethernet, and SD card slots all in one place.
Best for: Students, writers, and general users who want maximum port variety at a reasonable price.
7. Plugable Thunderbolt 4 and USB4 Dual HDMI Dock
This dock solves one of the most requested setups for MacBook M1 and M2 users: dual monitors. It uses a DisplayLink chip to bypass Apple’s single-display limitation, enabling two HDMI monitors on machines that would otherwise only support one.
Best for: MacBook Air and M1/M2 MacBook Pro users who want a true dual-monitor setup.
USB-C Hub vs Docking Station
These two terms get used interchangeably but they serve different purposes.
A USB-C hub is portable, bus-powered, and usually offers 4 to 8 ports. You plug it in and go. It is perfect for travel or light use and typically costs between $25 and $80.
A docking station is designed to stay on your desk. It connects to a wall outlet for its own power, supports more demanding devices like multiple monitors and fast storage, and often charges your MacBook at full speed. Expect to pay between $150 and $400 for a quality dock.
If you are building a home office, a dock is almost always the better investment. If you are mostly on the move, a compact hub does the job.
Best Use Cases
For Students: The HyperDrive GEN2 or a basic 6-in-1 hub with HDMI and USB-A covers everything from classroom presentations to dorm room setups.
For Professionals: The CalDigit TS4 or Belkin Connect Pro turns any MacBook into a full desktop replacement. Add two monitors and a mechanical keyboard and the laptop form factor almost disappears.
For Multi-Monitor Setups: Always prioritize docks with DisplayLink support if you are running an M1 or M2 MacBook. The Plugable Thunderbolt Dual HDMI Dock removes the biggest headache in this category.
For Travel Users: Portable hubs with SD card slots and HDMI are ideal. Keep the weight under 100g and the design slim. Satechi and HyperDrive consistently deliver here.
Common Mistakes to Avoid
- Buying a hub with too little power delivery. If your MacBook needs 96W and the hub only passes through 45W, your battery will drain while you work. This is a frustrating surprise people only notice after purchase.
- Skipping compatibility checks. Not every Thunderbolt dock works seamlessly with every MacBook. Read reviews specifically from users with your chip generation.
- Choosing based only on port count. More ports does not always mean better performance. A hub with 12 ports sharing a single USB 3.0 controller can bottleneck your speeds. Look at the underlying chipset, not just the port list.
- Ignoring build quality. Cheap hubs that overheat or disconnect randomly waste more time than they save. Look for aluminum builds and brands that stand behind their products with at least a one-year warranty.
Conclusion
The right USB-C hub or MacBook docking station does not just add ports. It changes how you work. A well-chosen setup reduces cable chaos, supports a faster workflow, and makes your MacBook feel like the powerhouse it actually is.
For most desk-based professionals, the CalDigit TS4 or Belkin Connect Pro are worth every dollar. For travelers and students, a quality compact hub handles daily needs without added weight.
Think about how you actually use your MacBook before buying. The goal is not the most expensive dock. It is the right one for your workflow. If you are ready to take your setup seriously, upgrading your connectivity setup is one of the most productive decisions you can make this year.


